この記事はテクニカルアーティスト向けです。
デザイナーには難しいWindowsマシンでPixar社のUSDをセットアップする方法を解説します。
目次
インストール
Git
Gitを初めて使用する場合、GitHubデスクトップGUIをおすすめします。
Gitの経験がある場合は、好きなUIを使用してください。
- インストール GitHub Desktop
7Zip
- インストール 7Zip
- 環境変数のpathに設定 ( C:\Program Files\7-Zip )
Python 2.7
- ダウンロード Python 2.7
- 環境変数のpathに設定 ( C:\Python27;C:\Python27\Scripts )
CMake
- ダウンロード CMake
- インストール時にすべてのユーザーの 環境変数のpathに設定
NASM
- ダウンロード NASM
- 管理者として実行
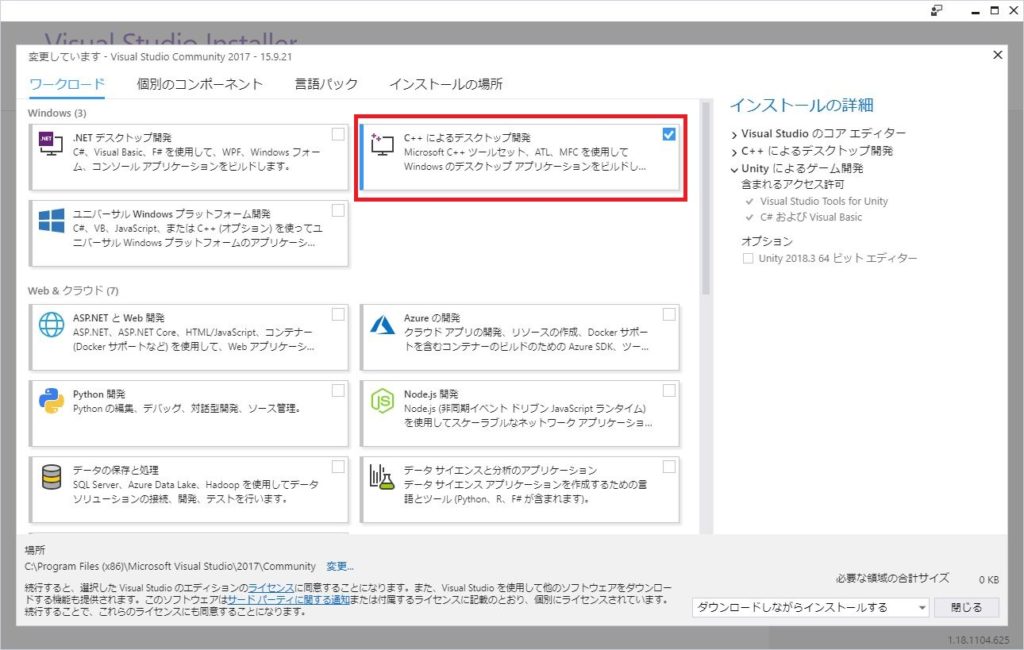
Microsoft Visual Studio
- ダウンロード Visual Studio Community
- オプションで develop for desktop C++ を選択
Microsoft Visual Studio Code
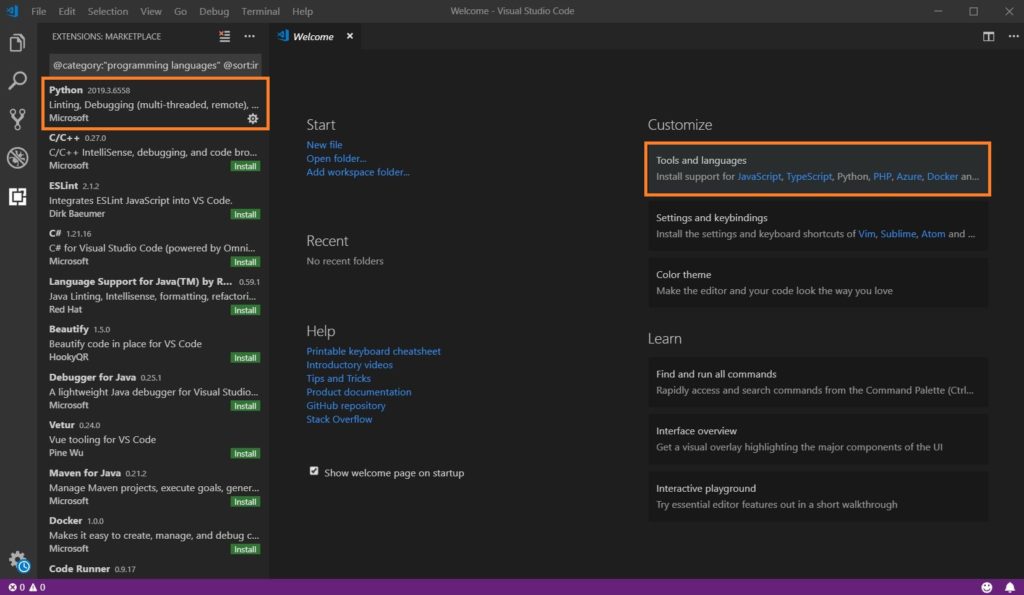
- ダウンロード Visual Studio Code
- インストール Python plugin for VSCode
ビルド準備
ソース取得
- リポジトリ Pixar’s USD Github repository
- 任意のパスにクローン
適当な場所に、USD のソースをクローンしてください。
例としてC:\dev\usdにします。 ビルド先は別の場所になります。
git clone https://github.com/PixarAnimationStudios/USD C:\dev\usd
Pythonモジュールのインストール
先ほどインストールした Visual Studio でも コマンドプロンプト でも可能です。
- pip install PySide
- pip install pyd
- pip install pyopengl
- pip install Jinja2
ビルド
VisualStudio の、x64 Native Tools Command Prompt を開きます。
cd c:\dev
python usd\build_scripts\build_usd.py "C:\usd"
この時にいくつかフラグを指定するとビルド構成を変更できます。-h でヘルプがでます。
あとから追加できるから安心してね
C:\dev>python usd\build_scripts\build_usd.py
 usage: build_usd.py [-h] [-n] [-v | -q] [--build BUILD]
                     [--generator GENERATOR]
                     [--build-shared | --build-monolithic] [--src SRC]
                     [--inst INST] [--force FORCE_BUILD] [--force-all]
                     [--tests | --no-tests] [--docs | --no-docs]
                     [--imaging | --usd-imaging | --no-imaging]
                     [--ptex | --no-ptex] [--embree | --no-embree]
                     [--embree-location EMBREE_LOCATION]
                     [--alembic | --no-alembic] [--hdf5 | --no-hdf5]
                     [--maya | --no-maya] [--maya-location MAYA_LOCATION]
                     [--katana | --no-katana]
                     [--katana-api-location KATANA_API_LOCATION]
                     [--houdini | --no-houdini]
                     [--houdini-location HOUDINI_LOCATION]
                     install_dir
環境設定
USDのツールをコマンドプロンプトから使うには、いくつか環境変数を設定する必要があります。
| 環境変数 | 値 |
| PATH | C:\usd\bin, c:\usd\lib を追加 |
| PYTHONPATH | C:\usd\lib\python を追加 |
USD テスト
コマンドプロンプトから球が表示されるか確認してみましょう
usdview .\extras\usd\tutorials\convertingLayerFormats\Sphere.usd
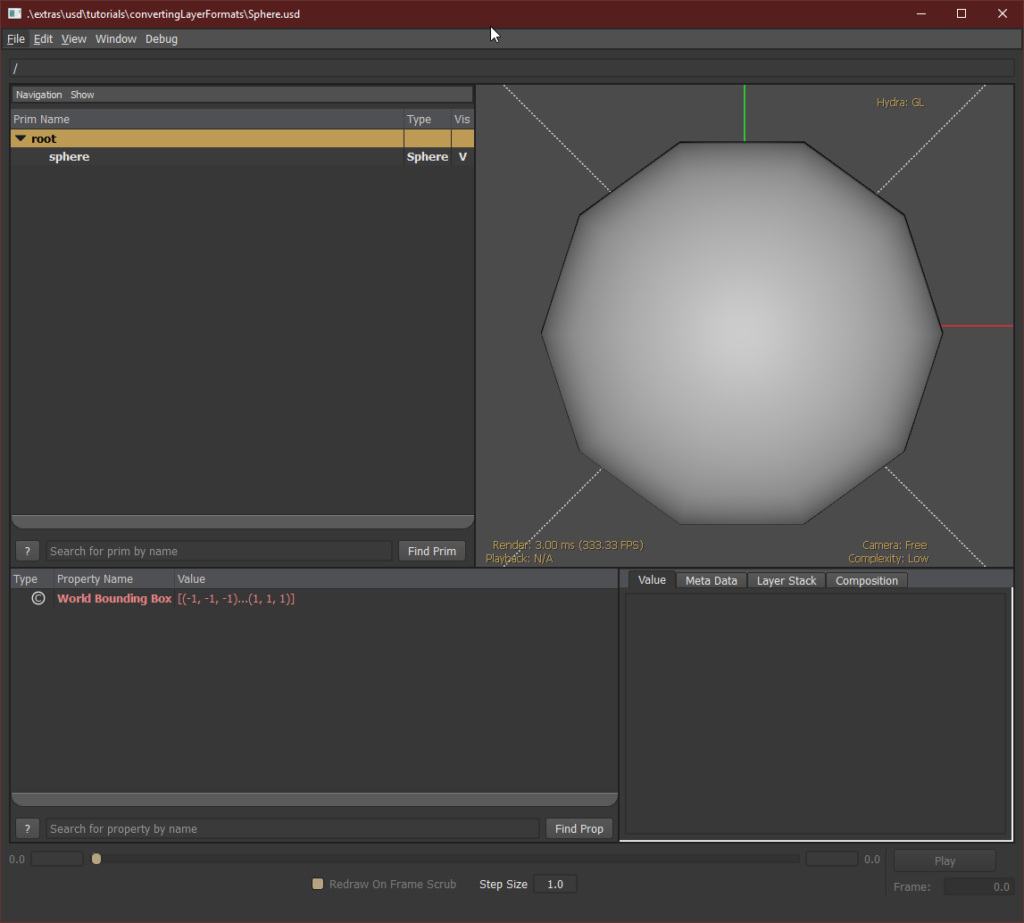
無事に表示されれば成功です。お疲れさまでした!


